Follow the Teaching in Higher Ed Podcast
About this Episode
Jeremy Caplan on episode 366 of the Teaching in Higher Ed podcast.
The really important thing is that we are engaging people.
Jeremy Caplan
On episode 366 of Teaching in Higher Ed
Voices on this Episode


Show Notes + Resources
- Jeremy Caplan’s Wonder Tools newsletter
- Pitch | Collaborative presentation software for modern teams
- Presentation Maker | From Basic to Beautiful in Minutes with Beautiful.ai
- Projector — Create to captivate
- Slido – Audience Interaction Made Easy
- Recommended Zoom Settings – YouTube
- Photos – Google Photos
- Send to Dropbox | Email + Dropbox
- Conversations in the cloud
- SpeakPipe – receive voice messages from your audience directly on your website.
- Flipgrid | Empower Every Voice
- Google Jamboard
- Padlet: You are beautiful
- An Online Visual Collaboration Platform for Teamwork | Miro
- MURAL.CO
- FigJam is an online whiteboard for teams to explore ideas together
- The Digital Gallery Walk: Collaboration on their feet – Ditch That Textbook
- Amuse-bouche
Recommendations from this Episode
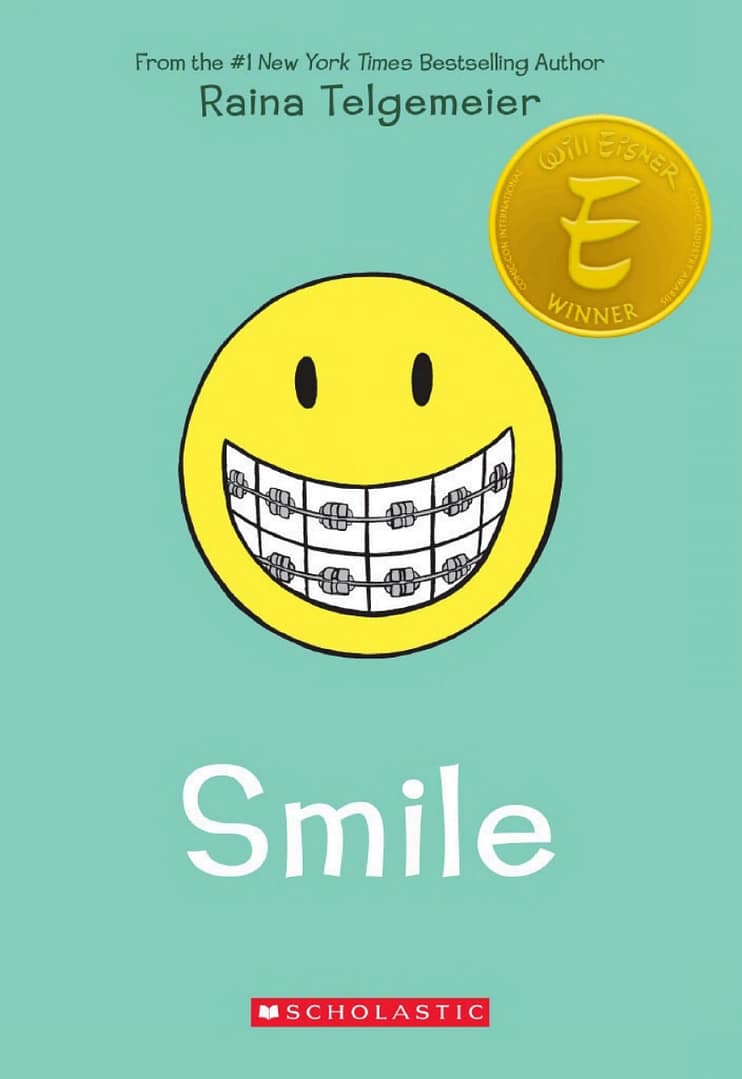
Book
Smile (Graphic Novel) by Raina Telgemeier

Technology
Goosechase
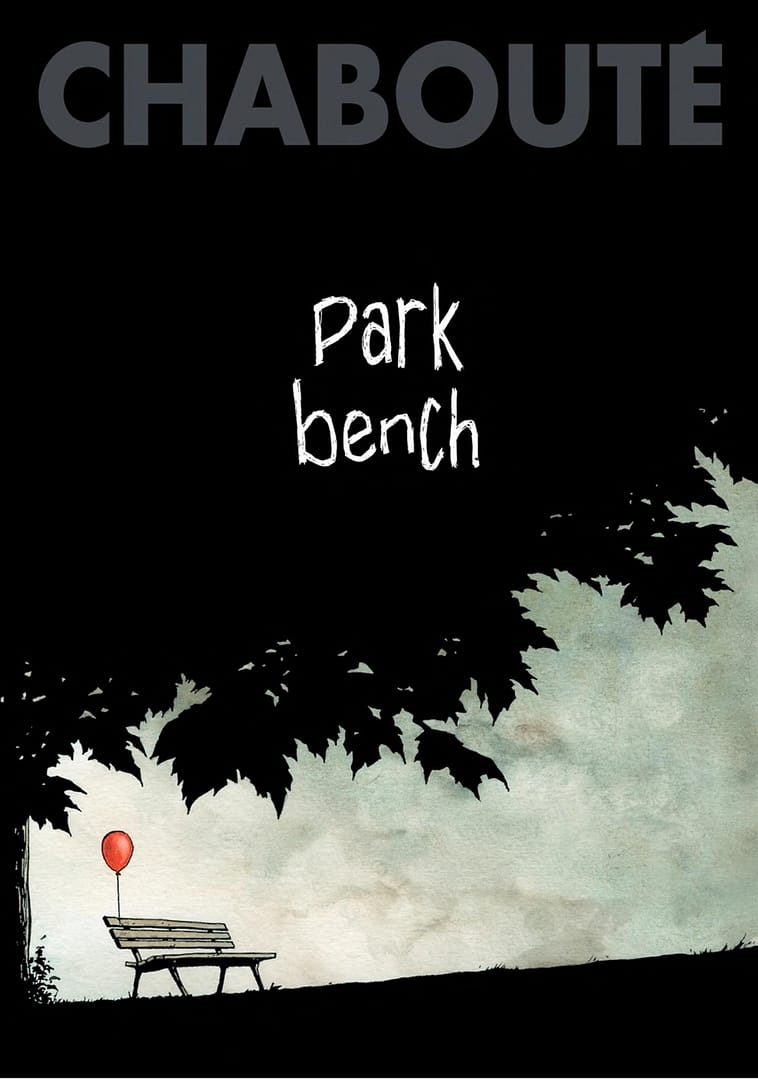
Book
Park Bench (Graphic Novel) by Christophe Chabouté
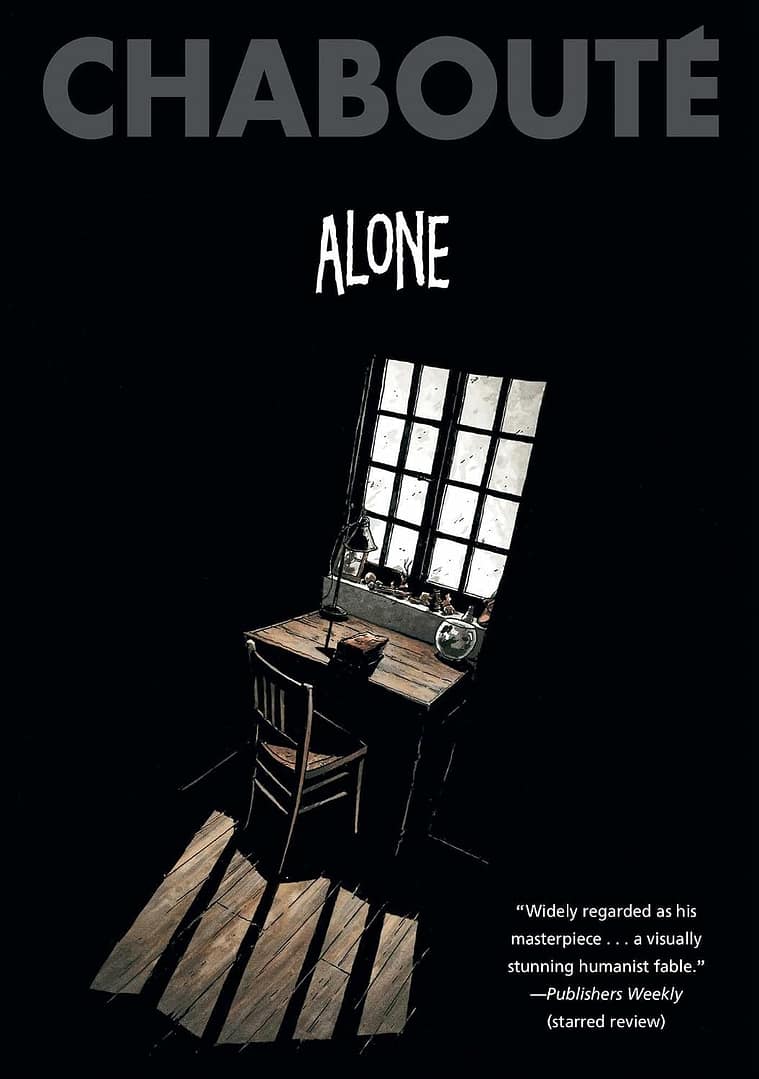
Book
Alone (Graphic Novel) by Christophe Chabouté

Article
Journalism through Learning Design Starter Toolkit
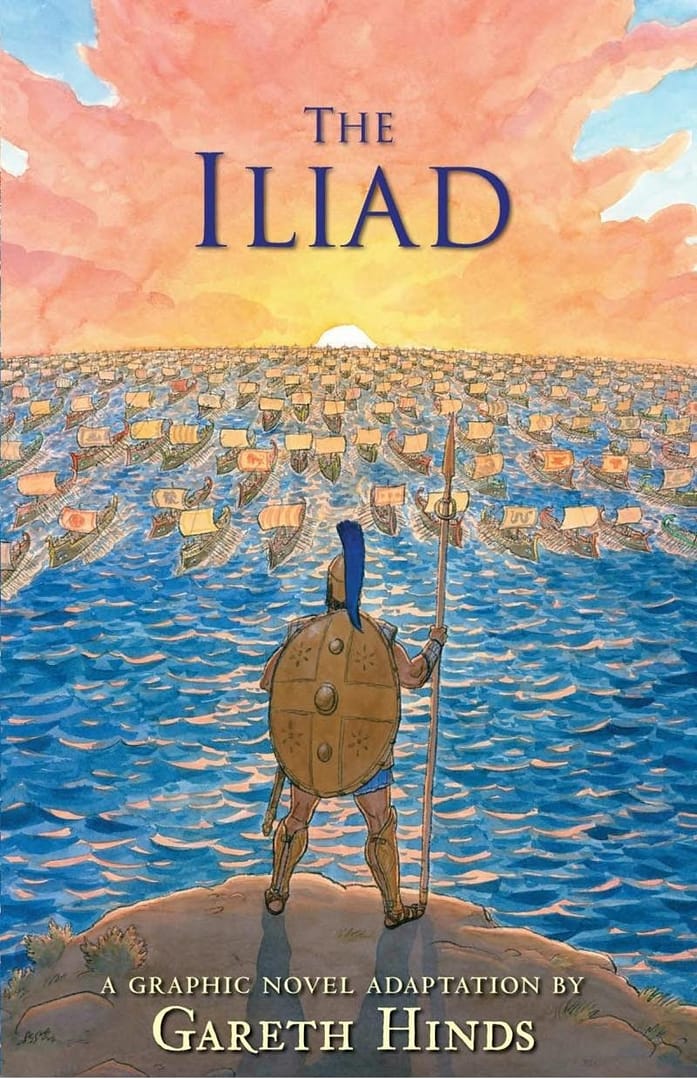
Book
The Iliad (Graphic Novel) by Gareth Hinds

Technology
Pathwright
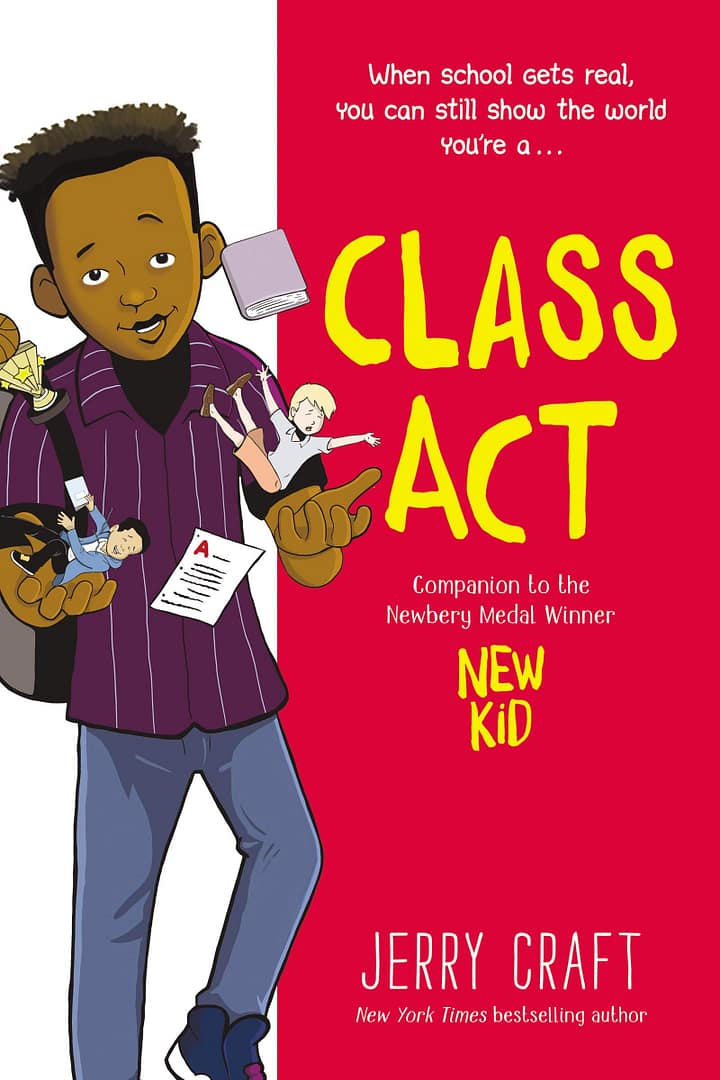
Book
Jerry Craft Graphic Novels
Transcript
[00:00:00] Bonni Stachowiak: Today on episode number 366 of the Teaching in Higher Ed Podcast, Jeremy Caplan tells us how to create a digital teaching toolkit.
[music]
[00:00:14] Production Credit: Produced by Innovate Learning, maximizing human potential.
[music]
[00:00:22] Bonni: Welcome to this episode of Teaching in Higher Ed. I’m Bonni Stachowiak, and this is the space where we explore the art and science of being more effective at facilitating learning. We also share ways to improve our productivity approaches, so we can have more peace in our lives and be even more present for our students.
[music]
I’m so excited to have today’s guest joining me, his name is Jeremy Caplan. He’s the Director of Teaching and Learning at CUNY’s Newmark Journalism School. He’s a reader, learner, and questioner, journalist and educator, teacher and writer, dad of two girls, violinist, and chamber music lover. He teaches graduate courses, leads workshops, and helps journalists develop new ventures. Jeremy, today’s guest, was introduced to me through Geoff Decker at ACUE, the Association of College and University Educators.
They were part of knowing each other through an educational experience as you’ll hear about. I wanted to share my gratitude with ACUE for sending me guests and for our partnership for all these years. ACUE’s courses and community site feature many of teaching and learning staff experts, faculty developers, and practitioners to show evidence-based teaching practices. For all these years, ACUE has connected me with great guests for the show. I’m thankful for the introduction to today’s guest.
Jeremy, welcome to Teaching in Higher Ed.
[00:02:03] Jeremy Caplan: Hello. Great to be here.
[00:02:05] Bonni: I’m glad that we get this opportunity to have a second conversation today or actually, this might even be a third. The first time you’re coming on the show and I’m excited for us to get an opportunity to learn from you today. You’re going to be sharing with us how to craft a custom toolkit that has different kinds of digital teaching tools.
Before you do that, would you talk about four ways that you group these tools together in terms of thinking about the affordances of them and how we might go about using types of digital teaching tools?
[00:02:39] Jeremy: Sure, absolutely. We often want to show things to our students and that it might be slides, it might be information, so show is the first part. We definitely want to ask things of our students. We want to engage with them and interact with them, learn from them. Asking is the second key part of the toolkit. Gathering is another key element, not just asking questions but gathering actual materials with students. Then finally, co-creating. We want to co-create as a collective group new information, new ideas, new projects.
Those are the four key elements; showing, asking, gathering, and co-creating.
[00:03:18] Bonni: For each of these categories, we’re going to talk a little bit about what they’re good at doing for us and maybe some either limitations of the tools or approach or just limitations that you find many of us have as we’re attempting to make use of them and really be able to leverage those. When we talk about show when we think about using digital tools for presenting, what do you think of as some of the affordances of the tools in this space?
[00:03:47] Jeremy: Well, one nice thing is that we can convey things in multiple ways. Students are hearing us either live in person or over a Zoom session. They’re also potentially seeing our facial expressions. When we use slides, we can add other elements. We can add GIFs. We can add visuals. We can add large text. We can add charts or graphics.
For different kinds of learners or to highlight different aspects of what we’re teaching, it’s really great to be able to show things visually in a way that connects with the teaching message and the learning outcomes for that session.
[00:04:21] Bonni: When you think about the challenges that many of us have when we attempt to use tools that fall under the show category we’re trying to present in this visual way that you described, what are a couple of the challenges that we tend to run into?
[00:04:37] Jeremy: We’ve all probably been, at some point in our careers, in some PowerPoint training session where there’s tons of bullet points, things are hard to see or just lots of text on the screen that’s complicated and confusing or unrelated to the core message and we want to avoid that. We want to present students with clear, simple information, ideas, concepts, frameworks, and visuals. We want to find tools that allow us to do that simply and to not have to devote many, many hours to preparation on that just on the visual side because, as teachers, we have so much other work to be doing.
We want to make use of tools that are both easy to use for us and also render really, really nicely and enjoyably for our learners.
[00:05:27] Bonni: What has been your experience with regard to either perceived or real need to have my notes with me? I find there’s just this constant rustle between, “Wait, I need a lot of stuff on my slides. I need those bullet points. If I don’t have those bullet points, I might forget something,” or “If I don’t have those, I’m going to lose my place or I won’t remember things.” What’s been your experience with that? Do you categorize that as a real need? Then, therefore, how do you resolve it or do you categorize that as a perceived need?
I realize any time you give someone dichotomous choices, there’s probably 40 other options that you might think about in terms of this whole domain.
[00:06:08] Jeremy: I think there are packers and then there are spacers. The packers like to pack a lot into slides and spacers like to put one core message and a big visual. I think people have different personality styles and different meanings, and different needs. By the way, I think that approach also applies to how we structure our lessons, our lesson plans. Some people pack in a hundred different points in a lesson and try to move really quickly through a lot of stuff to be exciting and inspiring.
Other people will space things out and there just three core messages for today. Both of those have value at different times and both of them are inclinations that different teachers have. I think it’s important to identify what works for you, what’s your gem, what flows for you as a teacher and then to secondarily make sure that that’s in accordance with what will resonates with students. In general, I think the spacing approach for visuals on a slide tends to be a little bit more manageable for students because it doesn’t ask them to read a lot on the screen at the same time.
It allows you to focus on one point at a time which is one of the nice things about slides is it allows you to move sequentially through ideas or concepts or information and to take as much time as you need to on a given point. I tend to prefer not to use the slide as my own notes or to remind me because I want it to be really the visual that comes across the students that we’re all focusing on. Then I can use other supporting elements to help me remember whether it’s a post-it or a note by my desk or whether it’s slide notes that’s within the tool that I’m using.
[00:07:49] Bonni: What I’m hearing so much from what you said is just thinking about the purpose of it. The purpose of this category of tools is to show things to learners, not to yourself. [laughs] If what you need to do is show something to yourself, there’s other ways like you mentioned, the note space that’s in all of the presentation tools I’m familiar with or having something even printed out. I’ll often print out a slide deck with nine slides on a page. Then that way, if anything were to happen technologically, I have a backup plan.
Then I also find them better with transitions. I see that next slide that’s coming which, again, many of the presentation tools will provide that for you in some type of a presenter view. I find I’m better if I’m moving around the room, I’m not locked to my laptop and then I can be looking at where’s my next transition. Sometimes I’ll even build in blank slides that, for me, are my little reminder of, “Okay, this is your transition,” and just mixing things up that way can be really helpful. All right. What is a show tool that you want to share with us that we might consider building into our toolbox?
[00:08:57] Jeremy: Sure. The first one I’ll mention and I read about this on my Wonder Tools newsletter, it’s called pitch.com. For now, it’s completely free for anyone to use including teachers. It just makes slides look beautiful. If you’re familiar with Google Slides, it’s web-based in the same way. Unlike Google Slides which has a more PowerPoint-like interface and a little bit more traditional bullet points-style design, pitch.com is made to really be elegant, enjoyable to look at, easy to work with from the editing perspective, and flexible.
You can use it to put a couple of images on the screen at a time, to put a couple of bullet points if you really want to. Whatever you put, the templates that pitch.com provides you with makes sure that it’s going to look really professional, really clean, really polished, really engaging for students. It allows you to collaborate with colleagues if you enjoy doing that. It allows you to present in a variety of different ways if you’re presenting online or in person. It works well for all of those teaching scenarios. I really am enjoying that as a pretty new presentation tool.
I have some others that are good for other circumstances. If you are somebody who teaches Science or Math or other technical subjects engineering, and you use a lot of numbers or graphics or charts in your presentations, there’s a wonderful tool called beautiful.ai. It has an amazing array of templates that are pre-made that are really elegant for any kind of data, any kind of visual, any kind of chart or graphic that you might use. You can simply select one and replace the data, update it with your appropriate information.
One thing that’s really amazing and unique about that tool is, it’ll adapt to the number or size of information you have, so if you have two bullet points, the webpage will essentially reflow to show those elegantly. If you have on one particular slide, a couple more points to make, it’ll resize the font, It’ll reflow the text in a way that naturally just works. A lot of people, when they end up editing slides, they end up spending a lot of time moving things around, changing font size. That’s actually where a lot of the time gets spent on creating presentations, for some people it’s on those minutiae.
Beautiful.ai takes that work out of your time spent and makes it a lot more efficient. One other one I’ll mention, which is also free at the moment it’s called Projector. This is also a new one this past year, and it’s a little bit hipper and cooler. If you’re someone who likes that hip, avant-garde style, or fresh graphics, and you like to embed a lot of GIFs or even videos into your slides, images, stickers, Projector is a easy way to do that. You don’t have to hunt around the web for your images and videos and GIFs. It’s all included in the Projector interface.
You can just drag and drop things into your slides. Again, like pitch.com, it has beautiful templates. You don’t have to redesign something from scratch. You basically just pick a template that resonates with you, replace the text, add a couple of images, and you’re good to go. Students really respond to the strong visuals, I find. It feels fresh, it’s easy to create it’s fast and it makes a strong impression when you’re teaching, which allows you to focus on the core message, which is what you’re trying to focus on the teaching and learning topics.
[00:12:21] Bonni: When we talked about show, we talked about presenting, we talked about some of the things it lets us do and also some of the hindrances. One hindrances we didn’t mention is that that’s often where some of us stop. We’ve got three more categories of tools to look at that can really help make learning a lot more engaging. What can you tell us about ask?
[00:12:42] Jeremy: Well, one of the most important things that teachers can do in my view is to start with the bang, start with engagement. We don’t want to start just by talking at students for a lengthy period of time, because that’s easiest way to get them disengaged as many of us know. We want to ask something and we to ask quickly, easily, and rate from the start of a session in many cases, and often at the end of the session, as well as we’re concluding and synthesizing.
Sometimes we also want to use ask as a quick intermediary step in the middle of a lesson to re-engage people, and also to see where people are at in terms of how they’re feeling about a topic, what their opinion is, what their view, what their experiences, what their personal experiences, how it connects to their lives, all of these kinds of things. We can ask them to draw out students and really re-engage them. Engage them and then re-engage them because we want to continually cultivate their attention as James Lang talks about, we want to re-cultivate their attention throughout.
We can use tools like Slido, which is one I love. It’s a simple polling tool, and you can use this in a live teaching situation in person or in a remote situation in place of the typical Zoom polls, which are only multiple choice. What Slido allows you to do is create a word cloud poll, for example. I often will ask students, “How are you feeling today? What’s one word that describes how you’re feeling at the moment.” That’s a nice way to give them a chance to check in with themselves and to check in with each other.
We get a quick word cloud that shows that, hey, a lot of people are feeling some anxiety today, or a lot of people are feeling excited about this new topic, or a lot of people are curious. That’s a nice starter, I find. Other times we’ll ask an open text question. What’s your experience with this topic that we’re talking about? What’s the biggest question that’s on your mind? What are you curious about today, or what’s one thing you hope to learn? Any kind of open-ended question works well with Slido.
One of the advantages of these kinds of tools, as opposed to using just the Zoom chat or whatever built-in chat that some people may use, is that this can be anonymous. Students may not feel comfortable saying out loud that they have a certain feeling or that they have a certain opinion, but with these polling tools, you can allow them that freedom of anonymity. You can still moderate, if you’re concerned about inappropriate things, you can still do some moderation if you need to, but I haven’t found that to be a big concern.
Slido is a great tool for that and even has ranking polls, so if you want to ask students, which of these three issues do you think is the most important cause of this issue that happened, or which is most important to you, or you can have them rank things. You can even use it for a game. It has a Kahoot-like function, which is a quiz, a game that they can win. You can use Slido in multiple different ways. One of the things I love about it is that you can just improvise as you go if you need to.
You can plan it in advance, but I often will use the Chrome browser and just type in poll.new, P-O-L-L.new, and it will launch and open up a Slido poll immediately. I can quickly type in the question if I have something that comes up in the class that I want to ask about, and then I can show the results by sharing screen, which allows everyone to see what the results are in a nice, beautifully presented way. They also, once they’ve answered the question can see the results on their own screen.
It’s really a nice way to get everyone on the same page, get people engaged in the topic, get them thinking about the topic in advance of discussing it or after discussing it to warm up the room at the beginning of the session, and then to synthesize things at the end of the session.
[00:16:09] Bonni: When we think about the downsides or some of the friction points of ask tools, or really actually I think this probably refers to all of the rest of the categories of tools is that now you are engaging people. There are increasingly tools that will integrate and be baked into synchronous web tools like Zoom or like Teams, but we’re not really there yet. Most of these are still– I don’t know what word you’re used to hearing for this Jeremy, but I was thinking like a second window. That can sometimes be, “Hey, pick up your cell phone if you’ve got a second device there or open up a new browser.”
I found that the friction went down once the whole world seemed like it started hopping on the Teams and Zooms of this world, WebEx, what have you, but it’s still present. How do you advise us the smoothest most seamless way to get around these friction points anytime you introduce a new second screen or second device, what’s your guidance to us?
[00:17:17] Jeremy: I think that’s a really important point. You want to make it as easy as possible for students and students have different levels, just like we all do on the tech familiarity. A few thoughts, first, the nice thing about it, as you said, when you’re on Zoom or on Meter or any other platform, Teams, you can just paste a link into the chat. That’s very simple that students just click the link and then the poll question pops up. There’s no complex things to install, nothing to download, nothing to register for, they just literally click the link.
I find that that’s very easy in a remote setting. Second thing is that, I do think it’s helpful the first time you use something to just give a quick walkthrough, there’s three steps to this, click the link, fill in your answer, and then hit submit. Even though that may seem obvious, for a student, if they’re encountering it for the first time it might be helpful. They may not realize they have to click submit, for example. I do just walk them through very, very quickly what that step is. The third point I’d make is that in many cases, we’re working with students on an ongoing basis.
There might be a little bit of the first time you use something say, “Hey, this is Slido, this is a poll tool, you just click the link and answer the question and then hit submit, and then we can see the shared results.” Once you’ve done it the first time, the second time I find students are just like, “Oh yeah, of course, we’ve done that.” It’s very familiar and it’s very comfortable. It might be a little investment upfront, but as long as you explain how it works.
I also like to explain why we’re doing it, and this is something I think we sometimes lose sight of that we teach and we do all these things, or we use certain tools and sometimes it’s not clear to students, “Why are you doing that? Why aren’t you just using the Zoom poll? Why are we doing polling at all?” I like to say to them, “Look, I want to hear what you have to say, I’m curious your thoughts about this. I think this might help us set up the next topic we’re going to talk about.” I even give them the meta-conversation about learning and pedagogy and what we’ve learned about the science of learning.
I’ll tell them if you predict what you think the most likely cause is, you’re actually going to be more receptive and more able to learn what the actual cause is than if we hadn’t even discussed it beforehand. Or if you synthesize this information now and put it in your own words at the end of the session, research shows your recall is going to be better. You’re going to have an easier time down the road, and you’re going to be able to use this information more comfortably. I’ll try to give them a little bit of that explanation of how the tool works and why we’re doing this and why this is a good approach that we’ve chosen.
Then I find they’re like, “Oh, okay, that makes sense”. They’re more likely to be on board with it. One last point in this area, sometimes the tool isn’t really the most important thing and in many cases. If you’re in person and you want to use an index card to do an ask, or you want to use a– you want to show a big piece of paper or a big sign or a big post-it on the wall instead of using a digital tech tool to show something like, I think all of those are great. It’s just a question of, in what context are we in and what’s the simplest way to achieve our objective and the most enjoyable one?
If it’s a matter of handing out an index card or even using the chat. If somebody doesn’t want to use a digital polling tool, they just want to use the chat, you can do that as well because I think the really important thing is that we’re engaging people and we’re not talking at them and we’re really working with them and interacting. Whatever’s the easiest way is often the best way, but I do think that sometimes an investment in trying a new tool can really open up some nice advantages like the ones we’re talking about today.
[00:20:34] Bonni: What I also am hearing in what you shared is that sometimes the added complexity is going to be worth it in the long run. We’ll get through that friction together such that it really does just become completely normal. We’ve all collectively built a new set of skills in and a new set of norms. I like your idea of definitely saying the why is, “Why are we doing this? We’re also going to be using this tool or a series of tools that all work in similar ways.” You just talked about those steps, Jeremy. Those steps are the same for practically any tool I can think of in terms of that second screen or the second device.
I’m going to be putting a link in the show notes to a video from Teddy Svoronos at Harvard. He makes a really short but very detailed video for his students of how he recommends that they set up their Zoom because there’s some default settings in there that he wants them to be familiar with and even some different views that you can create. He’ll talk about, “There’s going to be really two main ways I’m going to teach. Sometimes, you’ll just hear me talking, and then sometimes I’ll be working with the whiteboard, and here’s what I suggest.” It’s so concise.
I’m making it longer than I even need to. It’s so concise, but a really good way of laying down that foundation. What can you tell us about the kinds of ways that having tools that help us gather can benefit us?
[00:22:01] Jeremy: Some of these tools will be useful in live sessions. Some of them are useful in between classes as well. Some of them you can use in either. Some examples of tools that I use for gathering include Google Photos, which is a really simple one and basically it allows you to create a shared album that all students can add to. They can add images or videos. It’s very familiar to people because they use Google tools often and they have it on their phone and/or their desktop. It works well. It’s fast. It has no storage limit. It’s completely free to use.
You can give students a link to that shared Google Photos album. Once you’ve made it publicly editable or editable by the group, as you choose, they can then add their materials to it. Then, the second step is they can then comment on each other’s contributions. Depending on what kind of class you’re doing, the images that you’re using might be very different, but you can always have this kind of interaction where people are commenting on each other’s images and creating a collaborative album really by gathering all this information.
Another one that I find useful is sendtodropbox.com. This is a tool and there are others like it where you can basically have people send something into a shared dropbox, and then you can either have only access to it yourself if you’re just gathering things from students and then showing them selections, or you can make the access shared. One other additional way to do this is to do this through multimedia like through audio. You can use something like Google Voice, which allows anyone to create a free– It’s basically a digital phone number, but it’s the same as a regular phone number in the sense that anyone can dial it and then leave a voice message.
You can have your students record any message on that and gather their input on something, and then you can embed those into a webpage or into a learning management system. It’s a nice way to gather people’s different voices on that subject much like you might use VoiceThread or even something like Flipgrid. Both of those can be used in this way too, to gather student voices. One last one that I’ll mention is called SpeakPipe. This is if you have a webpage or an LMS where you want to have students record an audio message and gather their ideas.
Typically between sessions, gather their input or thoughts like an audio discussion board almost, or a video discussion board in the case of Flipgrid to again, gather different voices and have people contribute their own thoughts in their own words in their own way.
[00:24:20] Bonni: What challenges do you see people having when they start to use gather tools?
[00:24:26] Jeremy: There are some people who are using unusual devices. My daughters are in Zoom School, they’re five and eight at the moment. They have classmates who are on every known device you could imagine. Some students are on a Chromebook, some are on an iPad, some are on an Android tablet and some are even on a Kindle tablet, for example. That means that not everyone has the same interface when they’re trying to share something, whether it’s a file or a photo, or a video.
Fortunately, some of these like Google Voice just requires access to a phone number. Anyone who can call anything can call a Google Voice number and leave a voice message as part of this activity. Some of them get around that complexity a little bit. For other ones, there might be a little bit of figuring out the time that that’s required at the beginning to figure out, for example, how to upload something to a shared Google Photos album if you haven’t used that before. Some people prefer to use a public tool like Pinterest for this kind of thing too.
Pinterest allows you to create public shared pages or editable pages that are editable by a group like your students. That can be another alternative for that as well if it’s easier for someone.
[00:25:37] Bonni: I think so often about the friction of it. One of the nice things that you’ve described here is that there’s such little friction for many of them, but whenever we think about the lowered friction, that means lowered friction for anyone, not necessarily just our students. I always want to caution people that you wouldn’t want to put out on Twitter, for example, the link to your Google Photos album where anyone could put stuff up there if it wasn’t protected in some way. Keeping those links that are really, really open and allow someone to contribute without having to log in or being logged in, is going to be important not to put those in public spaces.
I don’t know if you have any other warnings like that for us.
[00:26:17] Jeremy: I think a lot of times these can be– You can invite people individually, so you don’t have to necessarily make the link totally public depending on the particular tool in that case. I agree that in some cases we want to make sure not to make the link available in public spaces just as you wouldn’t put your private phone number on a public Craigslist page or something. We want to be careful about that as well.
[00:26:42] Bonni: What can co-create tools allow us to do?
[00:26:47] Jeremy: This is where we can really make exciting things together as a group. This can be in a live session, in person, or online, or it can be something we do collaboratively over the course of a week, in between classes, or over the course of a semester. The tool that some people might be familiar with, which is a great starter for this, is Google Jamboard. It allows you to basically have a digital whiteboard that you share and people can add simple things like post-its and little comments and little drawings.
Then once you’ve mastered that, or if you want something more than that, there’s a whole range of really nice tools that allow you to do a little bit more co-creation. One of them that’s commonly used by teachers is Padlet which people may be familiar with and allows you to create multiple different vertical columns that allow people to organize and share and create information or images in different categories. Some newer ones include Miro and Mural, these are a little bit fancier whiteboards that allow you to create really intricate collective creations.
Whether it’s a framework that you’ve given your class and asking them each to fill in a certain section of it with images or diagrams or text or things that they find online. You can use it in a very simple way. A lot of people see it and get overwhelmed by a tool like Miro or Mural. By the way, both of those have free educator plans to start out with. A lot of people get overwhelmed because they are powerful professional tools. Actually, they have wonderful onboarding exercises and examples, and templates. As long as you can devote about 15 to 20 minutes to getting yourself set up, you can actually get started really easily.
I would encourage people to start with something very simple for the students to do, so there’s some very simple icebreaker activities just so that students can get familiar with the toolset on those tools for the first time because there are a bunch of different tools to choose from. The first glance can be a little bit overwhelming for students. It’s good to have a very simple exercise. Actually, both Miro and Mural come with preset templates, for example, for icebreakers. You can just pull up one of those and just practice with the students for a few minutes to show them how they’re going to co-create something on the board for something that you’ve planned.
A brand new one that’s just joined that’s even easier, which I really love, is called FigJam. If people are familiar with Figma, which is a super popular new design tool. FigJam is a free, open whiteboard, digital whiteboard that anyone can now use. It’s even simpler than Miro or Mural, and yet it’s really powerful for creating things together and collaboratively thinking about a topic and it’s fun. I think our teaching should really be fun. Our learning should be fun. It should be effective. It should be engaging of course, but it should also be fun.
These tools really allow us to have a little fun, be a little playful, and occasionally you can add a sticker or a little funny GIF or graphic. That enhances learning. It makes learning more effective and engaging. It just enhances the experience. That’s part of the co-creation process as well.
[00:30:01] Bonni: What have you found that people might run into as far as challenges go when trying to use these co-create tools?
[00:30:09] Jeremy: I run a program called the Journalism Creators Program at the Newmark Graduate School of Journalism at CUNY in the City University of New York. We do have some students who are coming in from various parts of the world for remote sessions and including places where there’s really low bandwidth or there’s complicated connectivity issues. We have occasionally had a couple of issues with people trying to use something like Miro collaboratively, collectively at the same time. In some cases that low bandwidth makes it difficult to take advantage of all the features of that kind of tool.
If you are dealing with low bandwidth situations or students who don’t have access to a relatively modern laptop, that kind of a tool might be a bit of a challenge for them. In which case you might try a simpler one like Google Jamboard, or even go back to even simpler tools. Again, if need be, have them use paper and be drawing something on paper and showing it in front of their camera, or if you’re in a remote situation or just using paper and pen in a live classroom. I think the important thing is people are creating together. They’re building together. They’re doing something engaging interactive and fun.
I’ve resorted to using tinfoil and toothpicks and clay and whatever the materials are, whether they’re digital or not will depend on the context. Just judging by what your students can do and what works for them, you can really do as exciting a newer thing as you’d like, or return to something traditional and effective as well.
[00:31:50] Bonni: One of the challenges that I have found in these spaces are actually two ends of a continuum. One challenge is students or learners not understanding that to leave the other stuff there. So sometimes you’ll have people that will delete everything that’s there, because they’re not accustomed to that. Multiple people will be working on this and it’s one of those things I have at least once forgot to explain, like, “No, you’re not starting with a blank sheet of paper. It’s not just your sheet of paper, but it’s something that multiple people will be contributing to.”
That’s been one end of that spectrum. Then on the other end is a real hesitancy to then change or modify anything. When you’re doing collaborative writing, part of that is understanding what your roles are going to be. If you’re an editor, we need to get to some space where we trust each other enough to let that person edit versus that, oh no, I have to leave their original exactly like it looked when I came across it and then somehow try to morph around it. I found an overarching guidance that helps us to set norms and also to identify and establish what those roles are going to be.
Sometimes I think it’s when you do a lot of collaborative work, you’re just so used to that. You just hop right on, off you go, and not recognizing that we’re taking our identities into these spaces and to be sensitive about what that means if you change somebody’s work without talking about it in advance. That doesn’t mean that you had a bad idea or a bad writer. These are some of the more collaborative people-oriented skill sets that I find myself needing to think about in addition to using the tool for whatever it is we’re trying to accomplish on the discipline-specific learning. If that makes any sense. Have you ran into this as well?
[00:33:41] Jeremy: Yes. I think that’s an important point. I think the first step is walking people through the instructions, as you said, making it really clear. Here are three things to keep in mind it’s okay to make a mistake. You can play around it’s important to respect other people’s work and, and to draw on your own space, et cetera. Setting up some instructions. The second thing I’ve found helpful is having a little experimental time. In other contexts, when we get a chance to try something a little bit before we might get to an amuse-bouche in a restaurant or something, to taste something or a sample at a Trader Joe’s or something.
I think giving people a little bit of a mess page, I call it a mess page or a scratch page where the first time we’re using something, they can just play around and try out the different tools and it’s okay to be messy or make a mistake or even erase something because they’ll realize how it works. Then when we’re trying to really create something for the exercise or activity where we’re past that scratch phase and we’re ready to go. The third thing that I think is helpful in this regard is having separate spaces to some extent. You use Jamboard, for example, you can have each group or each student have a separate little area that’s their own.
If you have Google Slides, I often have students, co-create a Google slide deck. They’re each working on a different slide and I’ll usually take a minute or two beforehand to just label the slides with their names or even just 1 through 20 or whatever number of students you have. Then they’re each on their own slide, for example, and you can do this with pretty much any of these digital whiteboard tools where you have– For example, with Mural or Miro, you can copy and paste an area essentially that is designated for each student so that they’re not working on top of each other digitally.
They each have their own designated work area and the same applies. even if you’re using a Google doc. Google Docs can be fine. There’s simple collaborative tools and you can designate a space for each group or each student to work in. Then there’s less risk of students typing on top of each other or deleting things. One thing I do encourage them to do though is when we’re doing these exercises is to take time. We usually set aside some time for students to look at each other’s work because there is also a risk that students just do their own thing and they’re not really noticing what else is going on.
We want to take a time just like elementary school students do a gallery walk. They walk around the room and see what everyone else put up around the walls. We do a digital gallery walk where we say, look at what everyone else created, and then most of these tools have commenting functions. You can drop-a comment and say, “Oh, that was really interesting. I wonder what you meant by this,” or, “I really liked that you mentioned that it connects to something that I was working on as well.” You get some additional interaction in that next phase after the initial creation.
[00:36:34] Bonni: I love doing that too and asking people to say, what do you notice the themes are or patterns, or what ones stood out as completely surprising or unique in some way and being able to see those connections can be so powerful and it’s almost a new lens that we can put onto our learning. That can be so powerful.
[00:36:53] Jeremy: It’s really fun and it’s something that can happen live in the session again, or it can be something you continue afterward as part of the ongoing thread of the class, and even with a tool like Padlet it allows that kind of commenting. Most of these tools really can work well, too, and to continue the discussion after class. The discussion after class or between classes, it doesn’t have to be on a “discussion board”. It can really be done in a creative way through some of these collaborative tools.
[00:37:24] Bonni: before Jeremy and I get to the recommendations segment, I wanted to thank today’s sponsor and that is SaneBox. SaneBox is one of those services that I’ve been subscribing to and so has Dave for so long that I almost forget how e-mail works without it. What SaneBox does is it helps take all of the stuff that pops up with equal importance in our inbox and sorts it with a lot of really smart thinking, the algorithm that it uses to sort things into things that might be less important puts them in other folders, such as SaneLater or Sane Newsletters, lots of ways to get things out of our inbox that are likely to be less important.
If it ever gets that wrong, which I still scratch my head because it really doesn’t with me but if on occasion I want to take something and retrain SaneBox, all I have to do is, for example, I could drag an e-mail from that SaneLater folder into my inbox and SaneBox just magically remembers, “Oh, next time she gets that same e-mail, she wants it to show up in her inbox instead of in the SaneLater,” and of course, vice versa works as well. Very easy to retrain it. I hardly ever have to do that, but if I ever do, it’s a really easy process,.
It makes it so much easier for me to manage my e-mail and to make sure that I’m not overloaded with a bunch of messages that all get treated the same when they really shouldn’t be in terms of priority. If you head on over to sanebox.com/tihe as in Teaching in Higher Ed, you can get a free trial and take advantage of a $25 credit toward a SaneBox subscription. Again, head on over to sanebox.com/tihe, and thanks once again to SaneBox for sponsoring today’s episode. This is the point in the show where we each get to share our recommendations.
I have one that actually relates back to you, and that is, I want to recommend that people go check out this notion page that you have for an event that we both got to be a part of. That is a link to Journalism Through the Learning Design Starter Toolkit. I’ll put a link to that in the show notes, but it is the same four categories of tools and many of the same tools that you just mentioned. Even though it’s in a journalism context, I found it so helpful just in any context to want to do these four functions. I just encourage people to go over and check that out as a way of extending the learning from today’s episode.
I’m going to pass it over to you, Jeremy, for your recommendations.
[00:39:59] Jeremy: Sure. I have a few final digital tools that we didn’t mention. I’ll just mention really quickly in passing. Then I’ll give you my personal recommendation. A few tools that are really, really fun and great I think for people to explore, if you haven’t, one is GooseChase. This is for scavenger hunts. You can use them with the class. You can use them for an orientation session. It’s super fun. It’s a digital scavenger hunt. I love using it with students to get them to know each other and to just have an onboarding fun experience. It’s a blast.
Another that I want to recommend highly if people aren’t aware of Pathwright. It’s a wonderful new way to think about learning paths online, creating learning paths. We’re all familiar I’m sure with learning management systems the big famous ones like Canvas and Blackboard, but there’s a whole other approach, which is to focus on creating a path for learning which Pathwright has created. It’s a small startup from South Carolina and not many people know about it in my experience and in the big world of higher education.
I found it to be one of the most elegant ways to create learning paths for people in different kinds of courses. If people are looking for alternatives to the traditional LMS solution, I highly encourage people to check it out. We’ve used it for our programs and I find it to be really, really great. The other big recommendation I’ll offer it has nothing to do with any of these tools. I write about these tools all the time for Wonder Tools which is my newsletter wondertools.substack.com. When I’m not thinking about tools or writing about tools, I love reading as I’m sure many people listening do as well, but sometimes I’m ready for something a little bit lighter or lighter on the eyes.
I’ve been super into graphic novels since the pandemic began in particular. I want to recommend a couple of really great ones. Gareth Heinz has really wonderful graphic novel versions of The Iliad and Odyssey and it’s terrific. Jerry Craft has a couple of really great graphic novels that are actually technically aimed at YA, young adult audiences, but I find them to be great. One’s called the New Kid. People might be familiar with Raina Telgemeier who’s another author who writes in that vein who wrote a book called Smile and there are a series of those graphic novels.
Then there’s just a great array of classic novels that are in graphic novel form. A Handmaid’s Tale is one I read recently. Oliver Twist, The Picture of Dorian Gray by Oscar Wilde, A Wrinkle in Time. All of these have really nice, relatively new graphic novel versions. If you’re looking to read but want something that’s nice on the eye, that’s my recommendation for today. Then if you’re looking for something really a little bit higher brow in the graphic novel realm, there’s a guy named Christophe Chabouté, a French graphic novelist who did a beautiful version of Moby Dick, which is just gorgeous and wonderful and has a few others, one called Park Bench, one called Alone.
Then one based on the classic Jack London story To Build a Fire, which is just fantastic. He’s a really wonderful graphic novelist that I recommend people check out.
[00:43:22] Bonni: Well, you definitely have not left us with nothing to play with after [laughs] today’s episode, nothing to check out. I am excited about checking out so many of the tools that you mentioned in the main part of the episode and following that up with the things that you recommended. Jeremy, thank you for being a guest today on Teaching in Higher Ed.
[00:43:40] Jeremy: It’s been a total pleasure, Bonni. I love your podcast. You do great work. I’m so excited to be in this community of educators who are working in this really, really exciting field.
[music]
[00:43:54] Bonni: I’m so grateful to Jeremy Caplan for joining me for today’s episode of Teaching in Higher Ed, I was energized by our conversation and then have all these things I want to check out and hope you do too. If you’d like to see the show notes for today’s episode, it’s probably already in your podcast player, you can probably swipe over depending on what app you’re using, but if you want to access it more directly, head on over to teachinginhighered.com/366, as in episode 366. You can also subscribe to the weekly Teaching in Higher Ed update.
These show notes will show up in your inbox, along with some other goodies, like other recommendations, some quotable words, and other things I think you’ll enjoy. Head over to teachinginhighered.com/subscribe if you’d like to subscribe to the Teaching in Higher Ed update. I’ll see you next time on Teaching in Higher Ed.
[music]
[00:44:55] [END OF AUDIO]
The transcript of this episode has been made possible through a financial contribution by the Association of College and University Educators (ACUE). ACUE is on a mission to ensure student success through quality instruction. In partnership with institutions of higher education nationwide, ACUE supports and credentials faculty members in the use of evidence-based teaching practices that drive student engagement, retention, and learning.
Teaching in Higher Ed transcripts are created using a combination of an automated transcription service and human beings. This text likely will not represent the precise, word-for-word conversation that was had. The accuracy of the transcripts will vary. The authoritative record of the Teaching in Higher Ed podcasts is contained in the audio file.